
Table of Contents
- Step 1: Define Your Brand Goals and Booth Brief
- Step 2: Design Branded Photo Booth Templates and Print Layouts
- Step 3: Choose Corporate Photo Booth Backdrop Ideas That Carry Your Visual Identity
- Step 4: Build a Photo Booth Social Sharing Plan
- Step 5: Turn the Booth into a Photo Booth Brand Activation
- Step 6: Handle Privacy, Consent, and Attendee Data
- Step 7: Measure Results and Report on Your Branded Photobooth
- Frequently Asked Questions
Last Updated: October 21, 2026
Step 1: Define Your Brand Goals and Booth Brief
Most corporate photobooths fail before anyone designs a thing. The brief is too vague. “Make it look like our brand” gives a vendor nothing to work with, and you get a generic setup with a logo slapped on the side.
Learning how to brand corporate photobooths starts with one page of decisions. We ask clients to lock these down before design begins:
- Primary goal: awareness, lead capture, content generation, or staff morale
- One key message: a single line guests should remember
- Logo files: vector format, plus clear-space rules
- Brand colours: exact codes, not “our blue”
Write the goal first, because everything else follows from it. A lead-capture booth needs a data flow. An awareness booth needs shareable photos. Those are different builds.
Ask your vendor for a one-page brand brief template before you sign. If they don’t have one, that tells you how much custom work you’ll actually get.
Step 2: Design Branded Photo Booth Templates and Print Layouts
Branded photo booth templates are the overlay designs applied to every photo and print. They carry more brand weight than the booth itself, because guests take them home and post them. Most guides stop at “add your logo”. The part that actually decides whether the print looks professional is the production handoff, so treat this as a small production job with a defined sequence.
The branding workflow, from assets to approved proof
A practical sequence that prevents most reprints and on-site surprises:
- Gather brand assets in one folder. Vector logo files (SVG, EPS or AI), exact colour codes (HEX for screen, CMYK for print), approved fonts or a licence to embed them, clear-space and minimum-size rules, and any legal disclaimer text.
- Confirm the output formats before design starts. Ask the vendor which print sizes and digital formats the booth produces, for example a 2×6 inch strip, a 4×6 inch print, and a square or vertical social file. Designing for the wrong aspect ratio is the most common cause of a rushed redesign.
- Build a mockup, not a finished file. Supply a low-resolution mockup showing logo placement, colour band, hashtag and QR code so the layout can be approved cheaply.
- Get a printed proof. Ask for a physical or PDF proof at final size. Check the logo at thumbnail scale, the hashtag at arm’s length, and the QR code by scanning it from a phone.
- Test on the booth before the event. Run a live capture and print on the actual equipment, then check colour accuracy, crop and legibility.
- Sign off and lock the files. Freeze the approved version and record who approved it and when.
Artwork specifications to give your vendor
Exact requirements vary by booth and printer, so confirm them in writing, but these are the details worth pinning down:
- Dimensions and resolution: final pixel dimensions for each format, at print-ready resolution (typically 300 dpi for print).
- Bleed and safe zones: a bleed margin around the trim edge, and a safe zone inside it where text and logos will not be cut off.
- File format: layered source files plus flattened exports, so the vendor can adjust without redrawing.
- Colour mode: CMYK for print files, RGB or HEX for screen and social files, they are not interchangeable.
Design for legibility and accessibility
A template that looks premium on a designer’s monitor can fail on a phone screen in a dimly lit venue. Apply brand guidelines, then stress-test them:
- Keep the logo in one corner at a size that survives thumbnail scale.
- Use a colour band or frame in a primary brand colour rather than a busy full-bleed pattern behind faces.
- Set the hashtag or event name in a clean sans-serif with strong contrast against its background.
- Check contrast ratios so text remains readable for guests with low vision; avoid thin light type on light backgrounds (Understanding Success Criterion 1.4.3: Contrast (Minimum) | WAI).
Build two versions at minimum: a print layout for the physical strip and a square or vertical version for social sharing. They are not the same file, and the social version usually needs larger type because it will be viewed on a small screen.
Ask the vendor for their artwork specification sheet before you brief a designer. A one-page spec covering dimensions, bleed, safe zones and file formats saves more time than any design revision.
Never approve a template from a screen mockup alone. A printed proof catches colour shifts, crop errors and unreadable type that a monitor hides.
Step 3: Choose Corporate Photo Booth Backdrop Ideas That Carry Your Visual Identity
Corporate photo booth backdrop ideas work best when they do one job: make the brand unmistakable in a photo taken from two metres away.
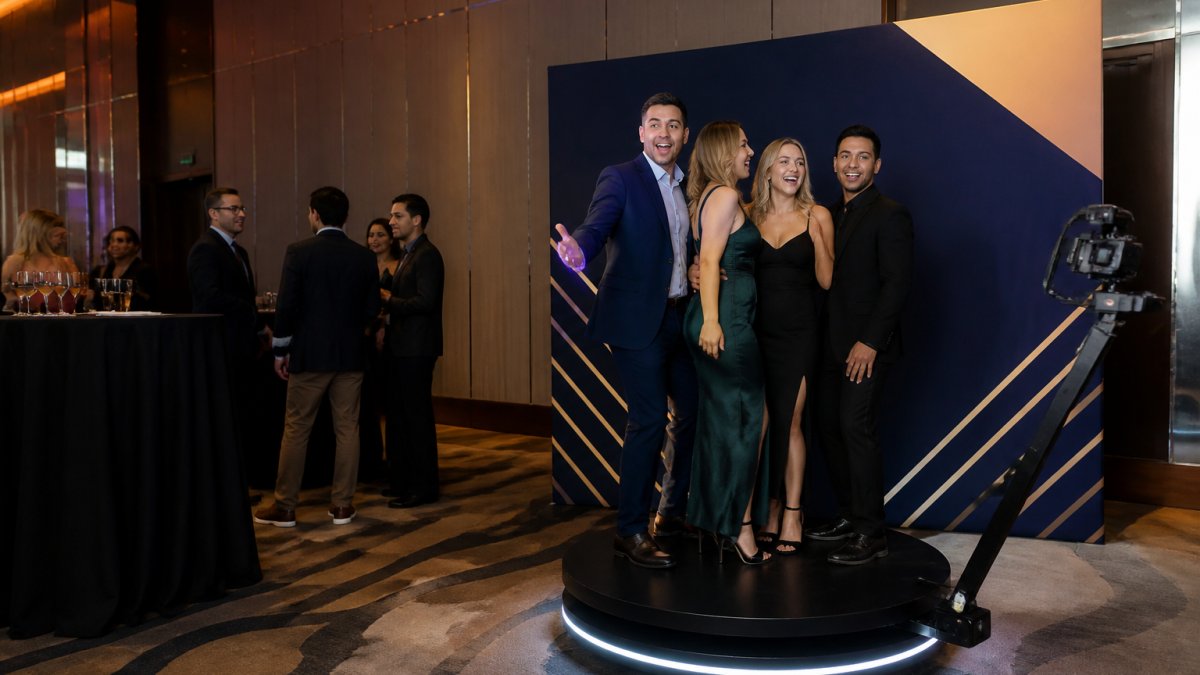
Three approaches that hold up in practice:
- Step-and-repeat wall with a repeating logo pattern. Reliable, on-brand, and works for any guest count.
- Colour-block set using two or three brand colours. Strong in photos and cheap to produce.
- Product or campaign set built around a launch theme. Highest impact, highest cost, longest lead time.
Skip anything that needs explaining. If a guest has to ask what the backdrop means, it’s decoration, not branding.
Custom Booth Exterior and Signage Options
The booth shell is prime real estate most planners ignore. Wrap the exterior in brand colours, add a lit sign with your campaign name, and place a small A-frame nearby with the hashtag and a QR code. Guests photograph the booth itself before they even step in.
Step 4: Build a Photo Booth Social Sharing Plan
Photo booth social sharing only works when the path from photo to post takes seconds. Every extra tap loses people.
Set up the sharing flow before the event:
- Instant share: email or SMS delivery, no app download
- Event hashtag: printed on the template and the booth signage
- Digital gallery: a single link guests can revisit
- Moderation: a review step if your brand needs approval before posts go live
Decide now who monitors the gallery during the event. An unmoderated feed is a brand risk, and a slow approval queue kills momentum.
Step 5: Turn the Booth into a Photo Booth Brand Activation
A photo booth brand activation is a booth with a job beyond novelty. The difference is a reason for guests to queue twice.
Give them one:
- Leaderboard: most creative pose wins a prize drawn at the end
- Lead capture: photo delivered in exchange for an email, with clear consent
- Product moment: a prop or set piece tied to the launch
- Staff prompt: a brand ambassador on hand to invite people in
The last one matters most. A booth with nobody working the crowd gets used for twenty minutes and then forgotten. A host who pulls people over keeps it busy all night.
Step 6: Handle Privacy, Consent, and Attendee Data
Privacy is where branded photobooths quietly go wrong. Photos are personal information, and collecting attendee data brings obligations under Australian privacy law.
Keep it simple and documented:
- Consent at capture: a clear screen asking permission to use photos and store details
- Purpose statement: say what the data is for, in plain words
- Opt-out: an easy way to receive the photo without marketing consent
- Retention: agree how long images and emails are held, then delete on schedule
The Office of the Australian Information Commissioner publishes plain-language guidance on handling personal information. Read it before you collect a single email.
Never use event photos in your own marketing without explicit permission. “They posed for the booth” is not consent to appear in an ad.
Step 7: Measure Results and Report on Your Branded Photobooth
Measure the booth like any other channel, or it becomes a line item nobody can defend next budget cycle. The aim is to connect booth activity to the goal you wrote in Step 1, using numbers you can collect without extra work on the night.
Set KPIs before the event
Pick two or three primary KPIs tied to your goal, and agree the target with the vendor in the booking. A common pattern is:
- Participation rate: sessions as a share of estimated attendees. This tells you whether the booth was visible and staffed well enough.
- Sessions per guest: repeat use signals that the experience, not just the novelty, worked.
- Share rate: shares or posts as a share of sessions. This is the clearest signal of share-worthy content.
- Opt-in rate: consented email or SMS captures as a share of sessions, for lead-capture builds.
- Gallery views and revisits: whether guests returned to the digital gallery after the event.
Attribution methods that actually work
Attribution is where most event reporting falls apart. Use simple, traceable mechanisms:
- Unique QR codes and landing pages per event or campaign, so scans and opt-ins can be traced back to the booth.
- UTM parameters on every link in the sharing flow and gallery, so web analytics show booth-driven traffic.
- A dedicated event hashtag to track user-generated posts.
- Consent-based email lists tagged by event, so downstream conversions can be attributed later.
- A short post-event survey to a sample of attendees, asking whether they used the booth and shared a photo.
Ask for a post-event report
Request a report within a set window after the event, a week is a common expectation. A useful report includes session counts, sessions per hour, share rates, gallery views, opt-in counts and any platform reach figures. Compare those against the targets agreed before the event, then decide whether the format earned a repeat booking.
Budget and customisation trade-offs
Branding options vary widely in cost, setup effort and impact. Rather than quoting figures, prioritise by return:
- Highest impact for lowest effort: branded templates and a colour-matched backdrop. These appear in every photo and are usually the first things to fund.
- Medium impact, medium effort: a wrapped booth exterior and lit signage. Strong for visibility, but adds production lead time.
- Highest impact, highest cost: a custom campaign set or immersive build. Reserve this for launches where the booth is a centrepiece.
- Low cost, easy add-on: a printed A-frame with the hashtag and QR code, and a staffed host to work the queue.
If the budget is tight, fund the template and the host first. A well-branded template in the hands of an engaged guest beats an elaborate set with nobody inviting people in.
The booth that gets booked again is the one with a written brief, a tested template, a live host, and a report that ties sessions and shares back to the original goal. Everything else is a prop.
Frequently Asked Questions
How do you brand a corporate photo booth?
Start with your brand assets: logo files, colour codes, fonts, and key messages. Apply them to three layers of the booth: the printed photo template, the physical backdrop and booth exterior, and the digital sharing screen or gallery. Give the vendor your assets at least two to three weeks before the event so there is time for proofs and one round of revisions. Confirm the final template in writing before the event day.
What can you customise on a corporate photo booth?
Most providers can customise the printed photo template, the backdrop, the booth exterior wrap or signage, the on-screen welcome message, and the digital gallery branding. Filters, overlays, and animated GIF frames can also carry your colours. Ask what is included in the base package and what costs extra, because exterior wraps and bespoke backdrops often sit outside standard pricing.
How do you encourage guests to share branded photo booth photos?
Make sharing one tap: QR codes on the print, a digital gallery link sent by SMS or email, and a branded hashtag displayed at the booth. Offer a small incentive, such as entry into a prize draw for guests who post. Place the booth in a high-traffic area near the bar or entrance so people see others using it. Brief one staff member to invite guests over during quiet periods.
How do you measure the success of a branded photo booth at an event?
Agree on metrics before the event: number of photo sessions, unique participants, shares and impressions from the branded hashtag, gallery visits, and any leads captured. Ask your vendor for a post-event report with session counts and sharing data. Compare results against your event goals, such as awareness or lead capture, rather than judging on photo volume alone.